


A Lesson in Bokeh
Bokeh results in visually appealing photographs. It forces viewers to focus their attention on one main focal point, while the background of the image becomes a unique blur. Often, that blur takes the form of dots of blurred light. That light can come naturally through trees or be done with Christmas or fairy lights.
The word bokeh actually comes from the Japanese language. The word boke translates as “blurred,” hence the name for the unique blurred background in a bokeh image.
With that said, obviously to create a good bokeh image, a photographer needs a Shallow Depth of Field. The photographer will also need DISTANCE between the main subject and the background to create this effect.
For this example, the photographer used a red light and a blue light on each side of the Donald Duck figure to create a unique two-toned lighting effect. The subject, Donald Duck, was placed on a mirror with white paper in the background along with two strings of fairy lights.
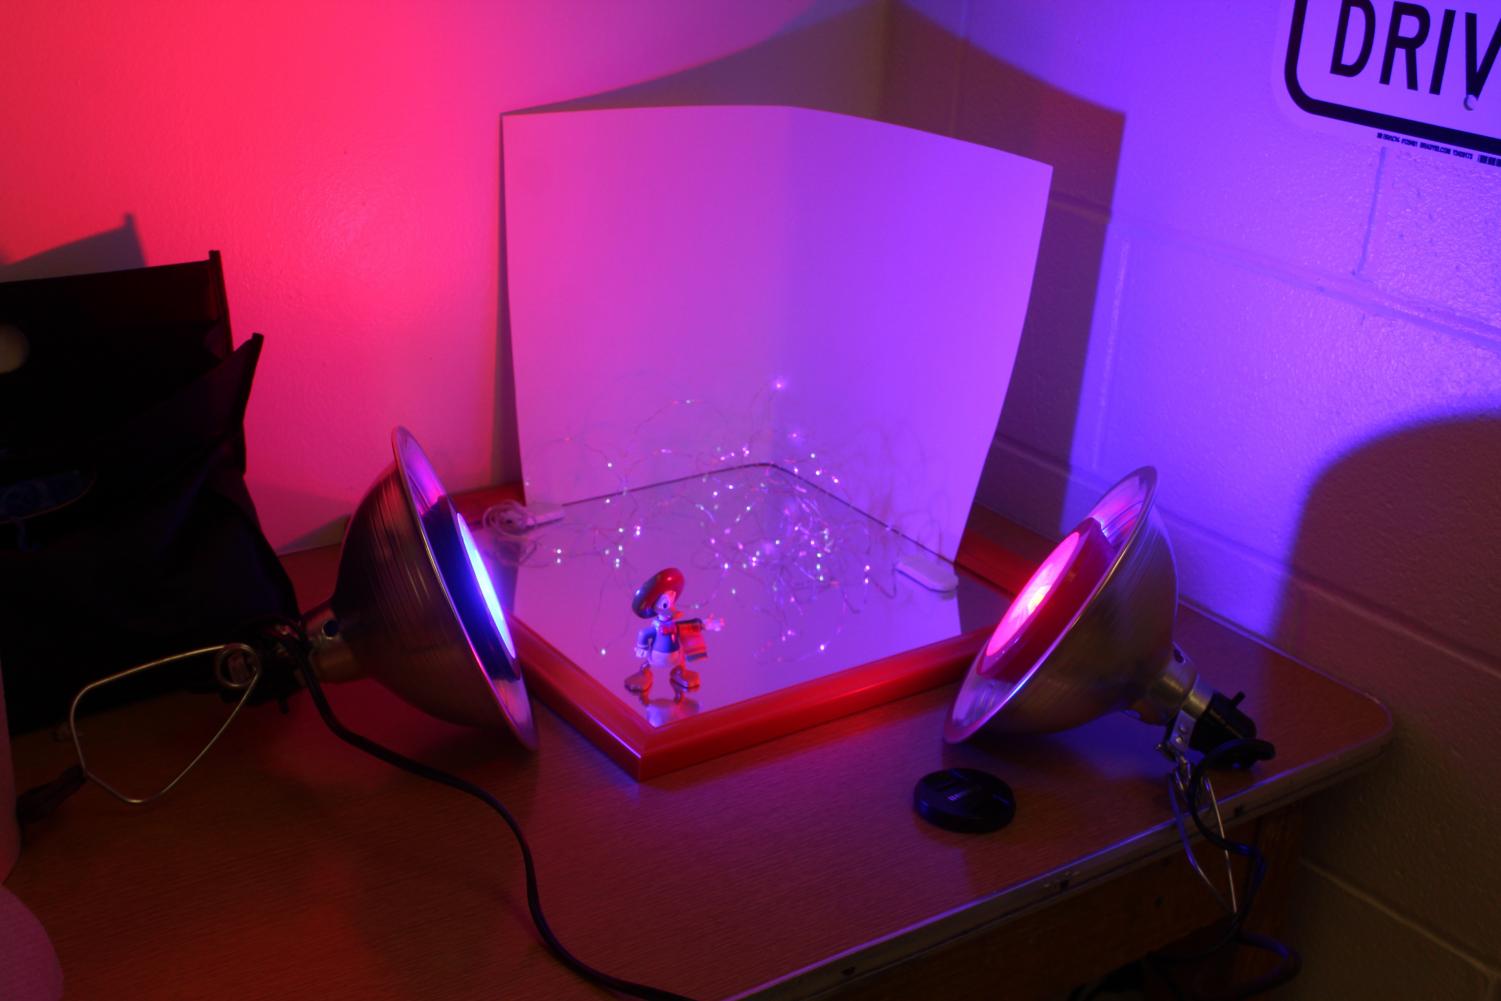
From there, the photographer made sure to get close to Donald Duck and take full control of the camera settings. By using Manual Mode on a Canon Rebel, the photographer selected a 1/200 Shutter Speed, a f5.6 Aperture, and an ISO of 400. The photographer also slid the lens into Manual Focus to control the focusing ring in order to fully blow out the background and mainly focus on Donald’s eye facing the camera.
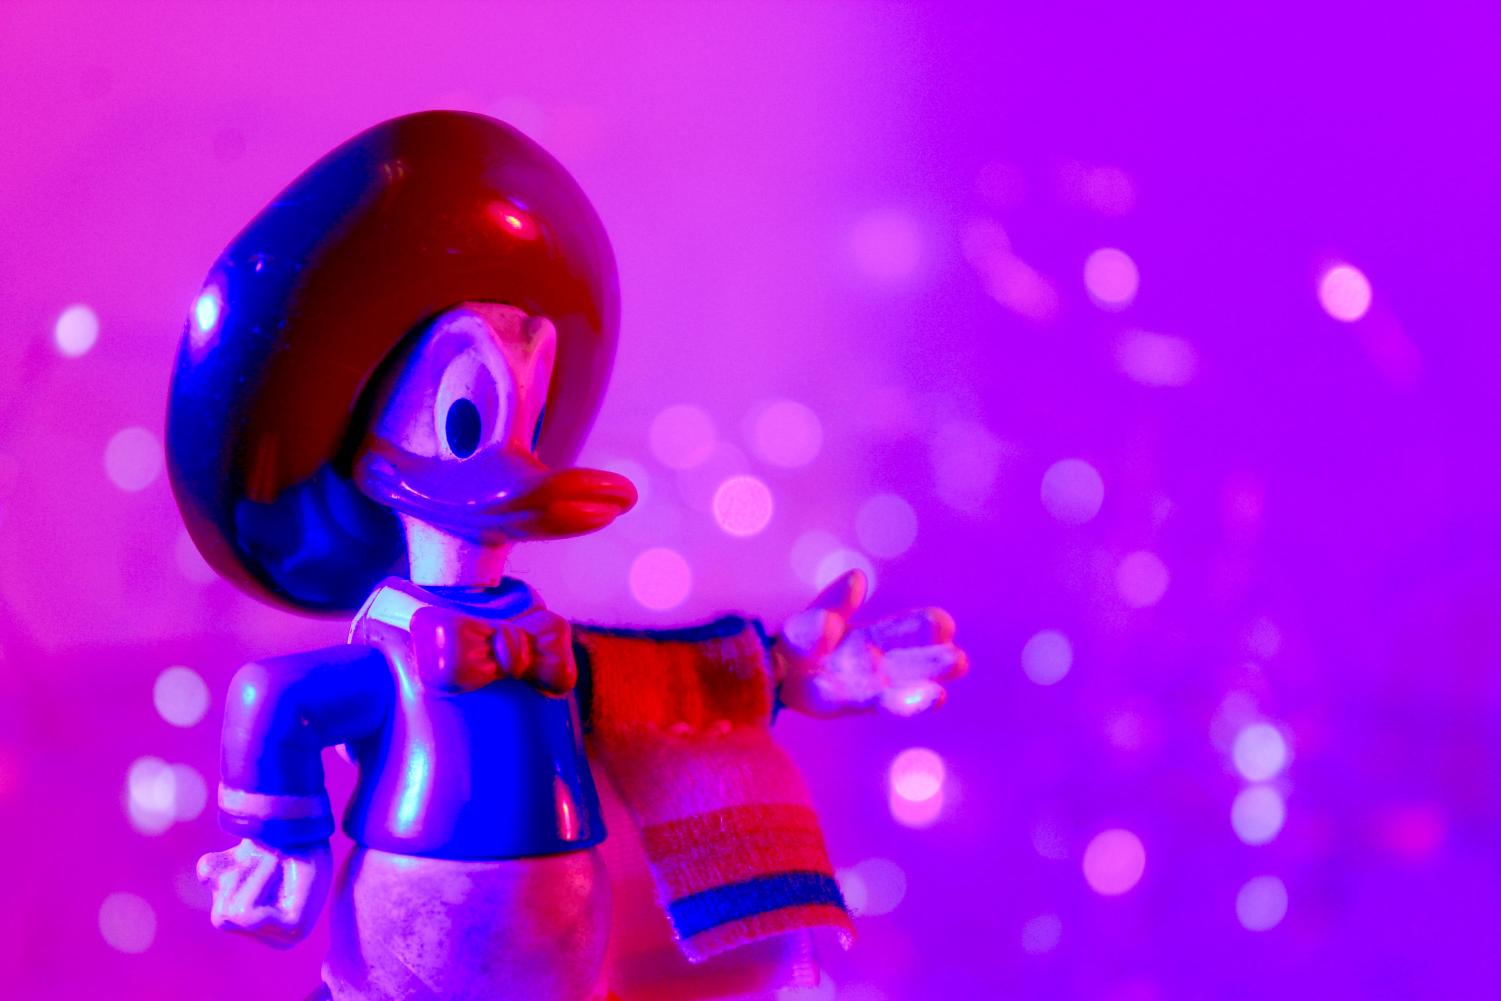
The mirror Donald Duck stood on actually helped “double” the amount of fairy lights in the background in order to create an even stronger bokeh background.
And, there you have it, folks! This is a short and easy introduction to how to create a bokeh image.
Now, it is your turn. Create some bokeh images and explore all the ways you can creatively capture the world around you.
Andy Pearsons • Jan 28, 2022 at 7:14 am
Hello!
I’m having a little trouble navigating the page, I think. I’ve used SchoolJournalism.org in the past, but it’s been a few months. I’m having difficulty finding the lessons and ideas that I can use in the classroom. Am I missing something (likely)? Can you point me in the right direction?
Thanks!
School Journalism • Feb 2, 2022 at 2:11 pm
Thank you for the comment, It would appear our navigation at the top of the page has disappeared! I wills see what I can do.
School Journalism • Feb 2, 2022 at 2:22 pm
WE FIXED IT. I got some help; somehow the navigation bar was not activated and we were able to re-activate it! It should all be easy to navigate once more.
GEGIE P SANICO • Jul 19, 2021 at 9:24 pm
Dear Maam/Sir:
May I ask permission to use Caption Writing Activity by Pat Graff of La Cueva High School, Albuquerque, N. M. from your site.
The said content will be essential in attaining the objectives of the learning resource for use by the public school learners in the Philippines.
Please comment in my email add at your earliest convenience.
Thank you and God bless you.
School Journalism • Aug 27, 2021 at 9:00 am
All resources here are FREE. Feel free to use them!