


Photographing Fires in Manual Mode
For the first time this year our Homecoming featured fire pits, which gave my yearbook students a unique opportunity to learn how to photograph fire, a bit of a tricky task if you have never practiced before.
Below, check out some tips for photographing fires.
- Shutter Speed. To capture all of the lights in the fire and to accommodate for the dark setting where you will most likely photograph a fire, shoot with a low shutter speed. We practiced at 1/10 sec.
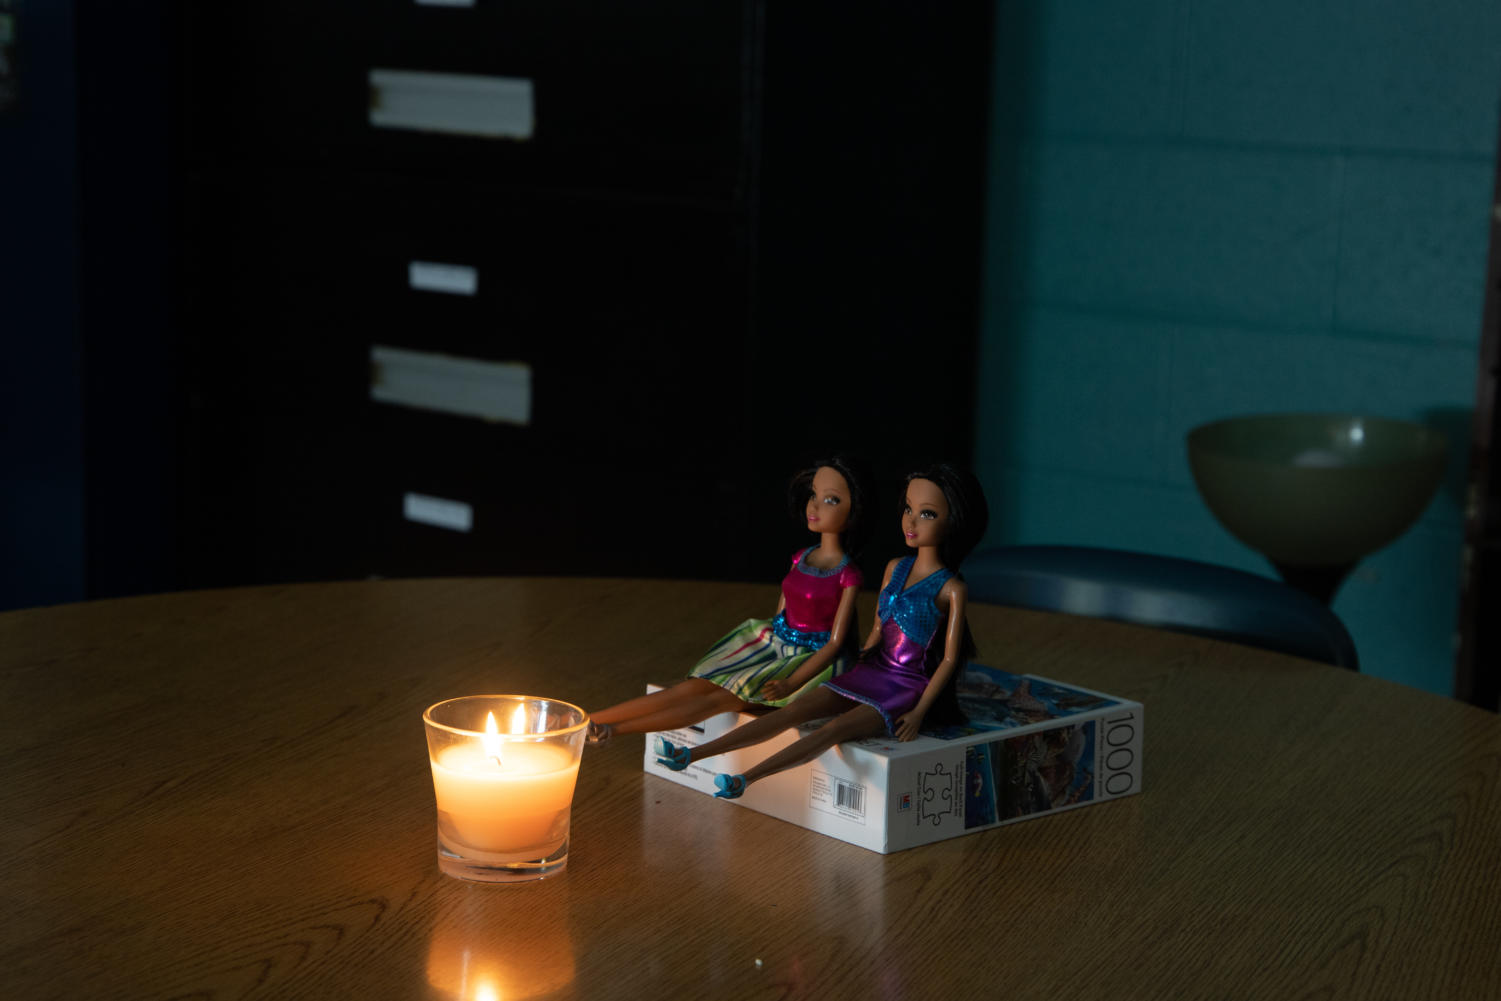
Students practiced photographing Barbies around a makeshift candle-lit campfire to understand the complexity of photographing in low lighting with fire. By using a candle and Barbies, students were able to practice analyzing exposure based on the subject of the photo (the candle or the Barbies). Be sure to check with your administration and get approval prior to this lesson as many schools have a no-candle-burning policy. - Tripod. If you are photographing at a low shutter speed, you will need a tripod. If you do not have a tripod, you can use a table or any type of stable standing structure. You don’t want it to easily wobble.
- Manual Focus. It is tricky to photograph fires in automatic focus because it is often dark or darker when there is a fire and with the fire, there are many elements on the plain the automatic focus might be trying to find. If it is dark, your camera might be struggling to find a subject to focus on since there is not enough light to find the subject. If this is the problem, switch to manual focus.
- Be careful with your ISO when photographing fires. If your ISO is too high, it will make the photo grainy and also blow out the colors in the fire. If your ISO is too low, the image will be underexposed. If you are photographing in a darker environment, it will be trickier to rely on the exposure meter in camera, therefore, you will most likely need to take a few test shots.
- Histogram and Highlight Alert. If you’re not quite comfortable eyeballing your test shots for exposure, utilize your camera’s histogram. Quick and simple: the left of the histogram is your shadows, the right of your histogram is your highlights. A perfectly exposed photo will have lots of balance in the middle, but high contrast images will create more variance across the graph.
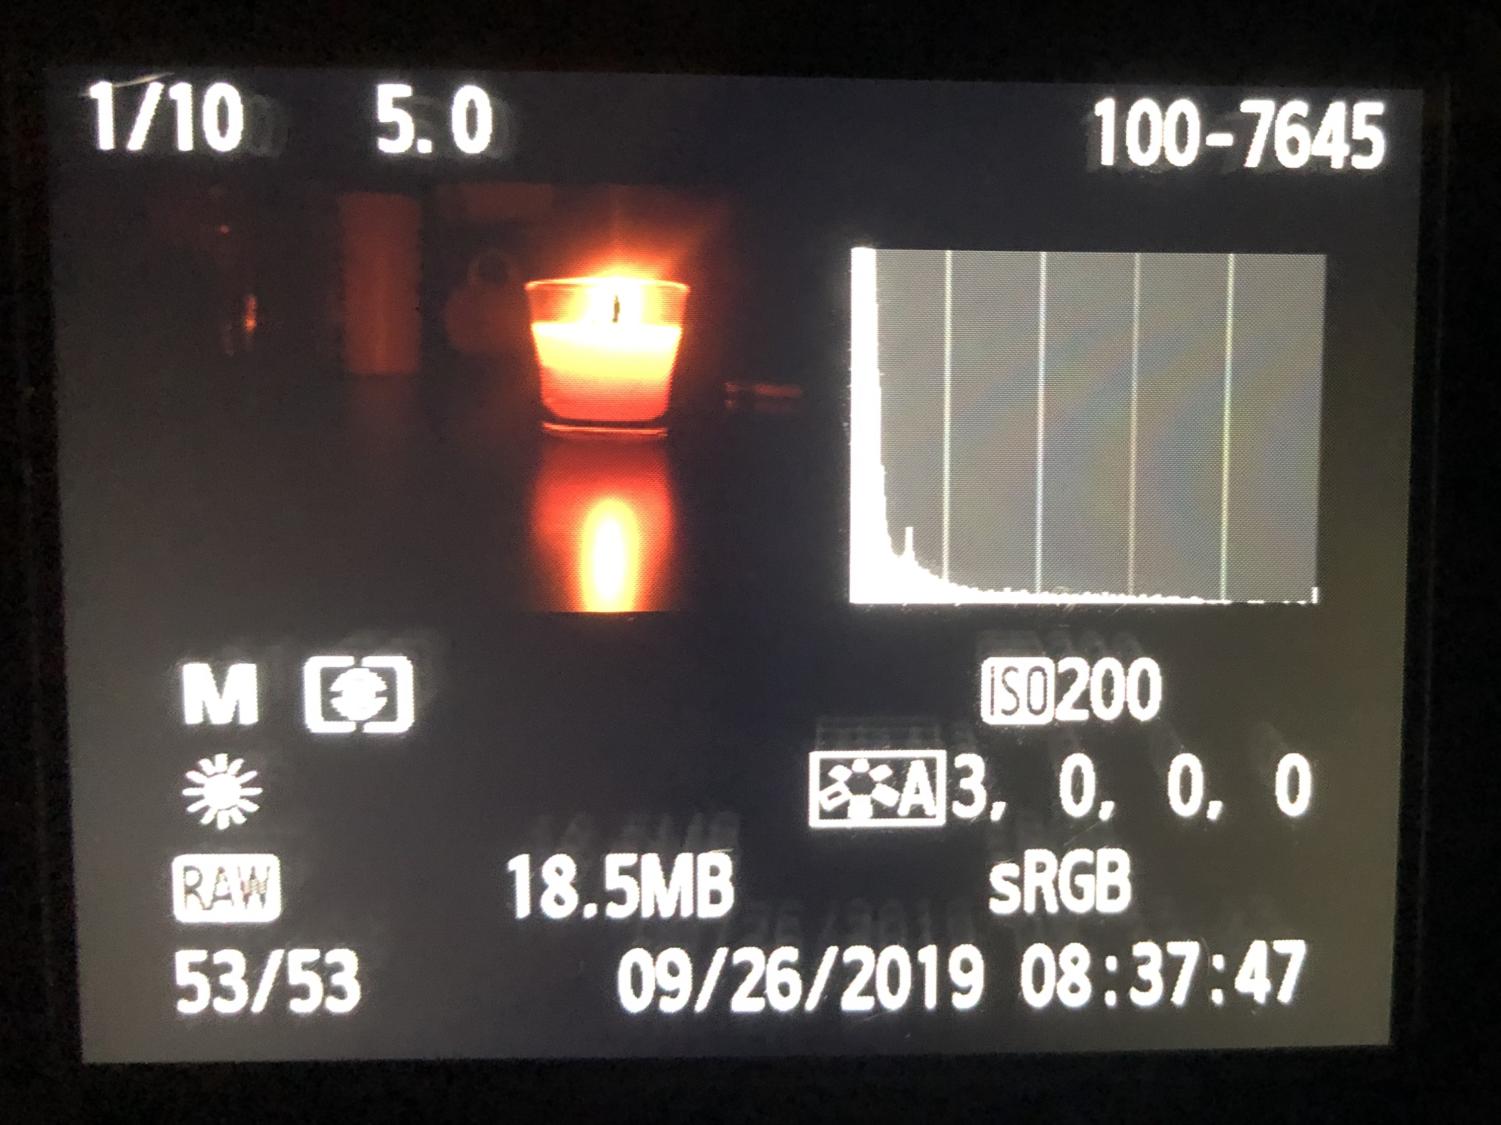
To examine the histogram related to an image, press your playback button to view captured photographs. Hit the display button until you see all the details of the photo, including the image’s histogram. If you’re shooting in a darker setting, your shadows are going to naturally fall off the left of the histogram graph and show a high peek to the left of the graph. However, what you want to avoid in this scenario is excessive highlight alerts. Highlight alerts will appear as a black flashing image on the image. This is an alert of overexposure, which is what you want to avoid if you are trying to capture all the colors in a fire. You can also see this on your histogram if you have lights falling off to the right of your graph. If this is the case, drop your ISO a tad, but don’t drop too low that you are underexposed.
If you are photographing people around a fire and find you are getting highlight alerts on the image in the fire, but don’t want to lower your exposure at risk of underexposing people’s faces, it is fine to lose some of the color contrast in the fire. However, if you are getting highlight alerts on people’s faces and in the fire on the playback image, you are overexposed and need to drop your ISO.
Check out this link I shared with my kids for reading material for photographing fires.
https://improvephotography.com/32628/11-tips-taking-cozy-campfire-pictures/